
From fleshing and salting to pickling, tanning, oiling, softening, and finishing, this kit walks you through a true commercial-quality tan at home
Hide tanning is a time-honored tradition that goes back centuries. It is the process of turning raw animal skin into soft, durable leather. This craft once formed the backbone of clothing, shelter, and tools in early societies. Today, you can still do it the right way at home, and the payoff is real. You get leather you made yourself, you control the finish, and you build a skill that sticks with you.
That is exactly why the Advanced Tanning Solutions Tan-a-Hide Kit exists. It is built to remove the guesswork, keep the process beginner-friendly, and still deliver a commercial-quality tan.
Tan-a-Hide: The All-Inclusive DIY Hide Tanning Kit

Tan-a-Hide is a one-stop solution for DIY hide tanning, using products formulated by industry pioneer Dale Knobloch. This kit is packed with the products, tools, and accessories you need to take a hide from raw to finished, without trying to piece together a process from ten different sources.
The kit includes:
-
Detergent
-
Hair Gloss & Conditioner
-
Softening Stone
-
Silk Powder
-
Dust Mask
-
Microfiber Towel
-
Non-Latex Disposable Gloves (2)
You will need:
-
Table Salt
-
Household Bleach
-
Baking Soda
-
Large Plastic Bucket/Container
-
Hot Water
This kit is designed with ample supply for 3–4 medium-sized deer hides or a life-sized elk, moose, or cow hide. The goal is simple. Make the process approachable and still produce a soft, supple, and stretchy leather that matches what commercial tanneries deliver.
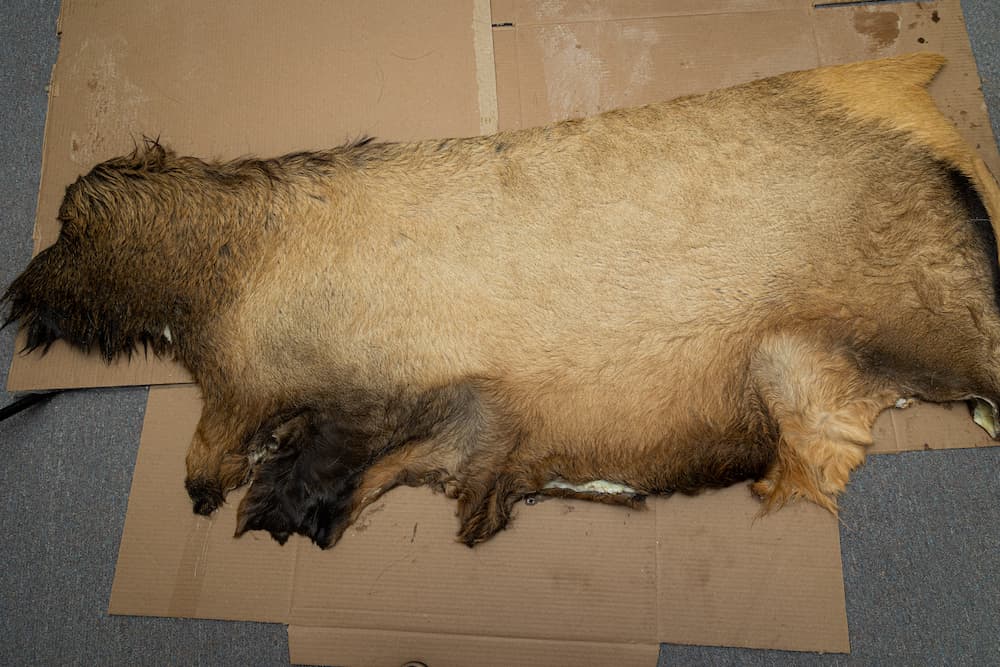
Preparing Your Hide: Fleshing, Salting, and Rehydrating
Taking care of your hide from the very start is extremely important. If you are getting the hide directly from the animal, handle it carefully from the moment it is removed. Delays in care can lead to hair slipping and a poor final result.
Ideally, start tanning as soon as the hide is removed. If you cannot, fold the hide hair side to hair side and store it in a freezer bag until you are ready to begin.
Step 1: Fleshing
Fleshing removes excess flesh, fat, and membrane from the hide.
Using the Fleshing/Shaving Tool included in your Tan-a-Hide kit, scrape the flesh side using a back-and-forth “slicing” motion, making sure all remnants of fat and flesh are removed.

This step matters because remaining flesh can rot during tanning and ruin the hide. To avoid cutting holes, remove thicker fat in layers.
Step 2: Salting
Salt draws out residual blood, body fluids, and non-tannable proteins.
 Lay the hide flat flesh side up and evenly spread a heavy layer of table salt, approx. 1/2 inch, across the flesh side. Cover every spot and pay extra attention to the edges.
 Leave the salted hide for a minimum of 12–24 hours.
After this period, if the salt is moist, shake off the old salt and repeat the process. This second salting ensures all moisture is drawn out.
Step 3: Rehydration Bath
Rehydration prepares the hide for the pickle.
In a plastic or rubber container large enough to hold your hide, create a rehydration bath using the following mixture for EACH gallon of HOT water:
-
3/4 cup salt
-
1 teaspoon Detergent (in the Tan-a-Hide Kit)
-
1/2 teaspoon household bleach
Mix enough solution to completely cover the hide and allow it to move freely in the bath. Stir to dissolve the salt and allow it to cool before adding your hide.
Soak the hide until it is soft and pliable, usually 12–24 hours. Then remove it from the bath and drain.
 If the hair feels dirty at this point, you can clean it with a water hose. Hang the hide up or lay it flat, apply detergent along the neck area, then use gentle pressure to spray clean water in the direction of the hair, letting the detergent work down toward the tail.

Getting Ready to Tan: Pickling and Shaving
Step 4: Pickle Bath
Pickle Tan A-21 is both a pickle and tan. Create the bath by mixing the following for EACH gallon of HOT water in the same plastic or rubber container used for the rehydration bath:
-
1/2 cup Pickle Tan A-21
-
3/4 cup salt
Mix enough solution to fully submerge your hide.
Immerse your hide in this mixture for 24 hours, or up to 48 hours for thicker hides like elk.
 Stir and agitate the hide in the solution a few times a day to ensure an even pickle.
If your hide has a bluish color after 24–48 hours, it may not be thoroughly pickled. Soak it for another 12–24 hours or until it looks white all the way through.
 After soaking, remove from the pickle bath and hang the hide to drain until just damp.
IMPORTANT: Do not discard the pickle bath, as it will be used again to tan the hide.
 Step 5: Shaving
Shaving reduces thickness, helps the tanning solution penetrate deeper, and produces a softer end result.
Lay the damp hide flesh side up on a sturdy flat surface. If you do not have a fleshing beam, a board or smooth log works.
 Start at one end and work away from yourself. Do not shave too thin and expose the hair follicles. The goal is to get the hide as thin as possible, so keep the tool sharp.
For extra thick hides like elk, moose, bison, or cow, you can use a hand or angle grinder with a coarse grit. Make sure the hide is semi-dry so the grinder does not slip across wet flesh.
 Making Leather: The Tanning Bath
Place the shaved hide back into the pickle bath for at least 24 hours, or up to 48 hours for larger hides.
After that, remove the hide and put a few cups of the solution into a mixing container.
Add 2 heaping tablespoons of baking soda for each gallon of solution used in the bath and stir to dissolve.
 Example: If you used a 10-gallon bath, you will need 20 tablespoons of baking soda.
This raises the pH and sets the tan.
Pour the baking soda mixture into the tan bath. The baking soda will foam, so make sure your soak tank is large enough that it does not overflow.
 Once the foam subsides, put your hide in the tanning bath for 4–12 hours. Make sure it is fully immersed and has plenty of room to move around.
Since this is a static bath, agitate the hide every hour to help the tanning solution penetrate evenly.
 After soaking, remove the hide and let it drain until damp, about 12–24 hours, before moving to the final steps.
Next Steps: Oiling and Drying the Hide
Step 6: Oiling
Oiling preserves flexibility and improves texture by replacing natural fats lost during tanning.
Lay out your damp hide flesh side up. Wearing the gloves from the kit, generously apply Hide Oil to the flesh side with your fingers, using circular motions for even coverage. Avoid getting oil on the hair.
After the oil penetrates, 1–2 hours, fold the hide flesh side to flesh side and let it sit overnight.
 The next day, open the hide and hang it to dry in a cool area where air can reach both sides.
 Step 7: Drying and Working the Hide
Dry slowly to prevent shrinking or hardening. Hang the hide somewhere cool and dry, out of direct sunlight. Avoid rapid drying because it can make the hide stiff.

As it dries, it will stiffen. After a day or two, pull and stretch it every few hours to keep it supple. This “working the hide” breaks up fibers and keeps the leather soft.
 Ways to work the hide include stretching, folding, and scrunching. Stand in the middle and pull up to stretch all sides. Work the edges back and forth with your hands and over a table edge. Or have a friend help you stretch it like a tug of war.


When the hide is mostly dry, buff the flesh side with the enclosed Softening Stone using a circular motion. This breaks fibers and creates a soft suede-like feel.
 Finishing the Hide: Final Touches
These steps are not required for function, but they elevate the look and feel.
 Brush with a soft-bristled brush. Then use a vacuum or air compressor to blow against the grain of the hair while lifting with the brush. This removes dirt, dander, and loose hair.
Add Shine
Use Hide Hair Gloss for a glossy sheen. Spray a thin application, then use the microfiber towel to distribute evenly in the direction of the hair. Let it set 1–2 hours, then wipe off excess.
 Add a Silky Feel
Sprinkle Silk Powder on the flesh side and gently rub it in with your fingers. A little goes a long way. Knock or shake off excess.

Caring for Your Tanned Hide
Keep the hide clean. Dust and dirt can roughen the hide and degrade it over time. Use a soft cloth or brush for regular cleaning. For deeper cleaning, a damp cloth and mild soap can work.
Store the hide in a cool, dry place away from direct sunlight or heat. Sun and heat can fade the hide and make it brittle. Store it flat or loosely rolled when possible. Folding can create creases that are hard to remove.
Troubleshooting Common Tanning Issues
Hair Slippage
Hair slippage means the fur or hair is loose or falling out. Once hair slippage occurs, in most cases it cannot be reversed. Slippage is caused by bacteria setting in.
Most common reasons to avoid hair slippage:
-
The animal was not skinned quickly enough
-
Meat, fat, and membrane were not cleaned off quickly or thoroughly enough prior to salting
-
The hide was left in the rehydration solution too long
We always say, “Treat it like you’re going to eat it.” That means if you are not going to tan right away, flesh and salt it or freeze it. If you do not, the hide can spoil quickly and lead to hair slippage. The hide can stay dry salted for several months.
If the hair is only slightly loose, you can use our Hair Set W-22 to prevent further slippage. Apply it right away. If Hair Set W-22 is not available yet, freeze the hide to prevent further damage until it is.
Stiff Hide
If the hide is stiff after tanning, common causes include:
The hide was not thinned or shaved properly
Solution: Rewet the flesh side with water and shave again, then rework the hide as it dries.
The hide was not worked enough during drying
Solution: Lightly dampen the flesh side with water, roll it up, and place it in a plastic bag for several hours until relaxed. Then rework the hide as it dries.
Not enough Hide Oil was applied
Solution: Rewet the flesh side, roll and relax it in a plastic bag. Once supple, apply another thin coat of Hide Oil. Fold flesh to flesh for 12 hours, then repeat the softening and breaking process.
The hide dried too fast
Solution: Rewet the flesh side and relax it in a plastic bag. Once supple, dry in a cooler area out of sun and indoor heat, then rework it.
Oil on the Hair
If Hide Oil gets on the hair, spot clean the area with a soapy sponge. If needed, run only the affected hair-side area under cool water and let it air dry.
Final Thoughts and Take the Leap

DIY hide tanning is a rewarding, practical skill, and it is more accessible than most people think. The biggest factor is preparation. If you care for the hide right away, flesh thoroughly, salt correctly, and follow the bath recipes and soak times, you set yourself up for a successful tan.
Remember the mantra, “Treat it like you’re going to eat it.” That mindset prevents spoilage and protects the hair.
If you are ready to try your first hide, the Advanced Tanning Solutions Tan-a-Hide Kit is designed to guide you through every step, from start to finish. Your first finished hide can become a piece of natural art for your home, a personal accessory, or the start of a skill you will use for years.
We cannot wait to see what you create.
Key Notes
-
Hide care starts immediately after skinning to prevent hair slippage and spoilage.
-
Salting is not optional. Use an approx. 1/2 inch layer and re-salt if the first round turns moist.
-
Rehydration and pickle baths use exact recipes per gallon, and cooling matters before the hide goes in.
-
Pickle Tan A-21 functions as both a pickle and tan, but thick hides may need longer soak time.
-
Baking soda raises pH and sets the tan. Expect foaming when you add it to the bath.
-
Hide Oil and proper drying speed control softness and prevent brittleness.
-
Working the hide during drying is how you earn supple leather.
-
Finishing steps like fluffing, gloss, and Silk Powder elevate the look and feel.


